How-To
Remove Broken Taps
...or...
Making and Using
a Basic EDM
Created: 2006-12-19

Background
We've all heard the tale of woe where some disaster occurs during the very last machining operation of a long and complex process? Let me tell you that it's only apocryphal until it happens to you. My deHavilland Cirrus Mk I project had been ten years in the making—on and off, admittedly. With all components machined and ready for final assembly, the last task was to drill and tap four 4-40 blind holes in pads on the sides of the crankcase that would take the mounting studs. Starting this operation, I noticed my venerable 4-40 bottoming tap was making squeak-squeak noises and felt a bit tight. Needs sharpening, thought I. Must do that before using it again. Well, it managed three holes, then on number four it gave the inevitable tink! Yes. The. Very. Last. Hole. Oh, bother, or words to that effect.
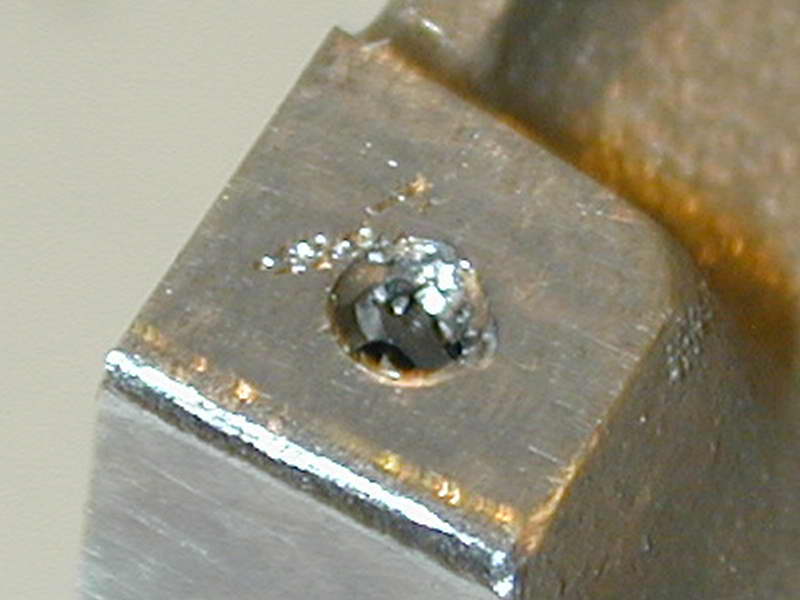 It had sheared obliquely, deep in the 0.350" blind hole. This locked the two parts together so naturally it broke a second time level with the hole as I tried to remove it. The core size of a 4-40 tap is about 0.080" (2mm). This is too small for such things as "easy-outs", or tap-flute gripping pins. From past reading, I knew of several possible solutions:
- Ignore it and work around it
- Junk the part and make another
- Drive it out with a punch and tap a larger size (or plug the hole and tap the plug)
- Insert pins in the flute passages to grip and turn the broken stub
- Drill, grind, or generally worry away at the fragment with something harder than it is until it breaks apart
- Drill into the tap with something harder than it is, then insert an "Easy-out" or a hex-key to get a grip on it for unscrewing
- Disolve the broken bit with some acid that will attack the tap faster than the surrounding metal
- Burn it out by "Spark Erosion"
In the circumstances, options 1 and 2 were out, although they should always be given calm, serious consideration. The hole is "blind" so #3 is out (it would also look ugly, being in a very obvious location). Number 4 won't work on very small taps as the pins will be too thin to apply the required torque. I tried #5 using a carbide burr and only succeeded in wandering off and scratching the surface of the pad, as can be seen in the photo. And if #5 is out, so is #6.
This narrows the field to the last two options. I've read that concentrated nitric acid would eat the steel but not react with aluminium. However obtaining some of this stuff would be difficult and I have a healthy fear of strong acids. So, by elimination, we arrive at "spark erosion", also known as Electrical Discharge Machining (EDM). There is no doubt that this is the best choice, provided you can find someone to do it for you, or failing that, are prepared to make a significant investment in time and materials to build you own.
The remainder of this article will detail the construction and use of a simple EDM (if this is simply, you don't want to see complex!) It is built to a design by Ben Fleming which is fully detailed in The EDM How-To Book [1]. This book was reviewed as Book Of The Month in the December 2006 issue of Model Engine News. If you have not already, it would be a good idea to read that review first.
Construction of this device uses skills in machining, electronics assembly, and plumbing. I must point out that while I have no formal training nor qualifications as a machinist and plumber, I was once considered well qualified in electronics design and construction. So some electronics related things that seemed straight forward to me may not be to others. Of course the converse will be true when the pipe wrench comes out  .
.

| Next: EDM Designs |
 Model Engine News Home
This page designed to look best when using anything but IE!
Please submit all questions and comments to
[email protected]