Building the
Atom Minor Mk III
by Jan Huning
3. Rear Endplate
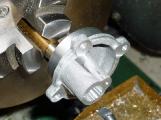
The backplate was held in the 4-jaw, over the mounting screw bosses. A little care was required to get it running true both radially and axially. The face against which the disc valve rotates was faced to length, and the mounting spigot machined, again, making corrections as necessary to the length to compensate for any deviation in the actual axial length of the crankcase compared to drawing. The axial position of the disc-valve face should be such as to leave the mounting flange the same thickness as the flange on the front housing, if possible (for appearance purposes only). The 6BA hole for the disc valve pivot was finally drilled and tapped.
The backplate was then held by the machined register in a small 3-jaw on the rotary table to mill the mounting screw bosses to length, taking care to ensure they were the same thickness as those on the front housing. The mounting screw holes and the intake hole were also drilled at this setup, and the facing for the disc-valve pivot locknut was milled to clean. (No photos of any of this.)
For machining the tapered bore on the inside section of the inlet hole, the backplate was held on a parallel brass mandrel, fitted to the drilled inlet hole. Only a light push fit is needed as the cutting forces are very low. A tapered mandrel was then machined to mount the backplate for machining the tapered bore on the outer section of the inlet bore. The tapers were machined in this order, since the inner taper is shallower than the outer taper, and there is less risk of the backplate coming loose off a shallow tapered mandrel. The tapered bores could also have been machined using tapered D-bits.
The cross-hole and spotfacing for the spraybar was machined holding the backplate in a machine vice, clamping over the discvalve face and the outer end of the inlet stub. It should only be clamped lightly, to avoid leaving marks on the valve seating face (how do I know??). The backplate is turned 180 degrees to machine the spotface on the other side. It can be set correctly by putting a drill through the hole for the spraybar, and setting this vertical with a square. The two spotfaces will hopefully now be parallel. (No photos of this.)
The bosses for the mounting holes in the front housing and backplate were filed to match the bosses on the crankcase. Little filing buttons were made to help with this.
Model Engine News Home
Please submit all questions and comments to [email protected]


