Hope B Restoration
by Adrian Duncan
 |
 |
|
| Click on images to view larger picture. | ||
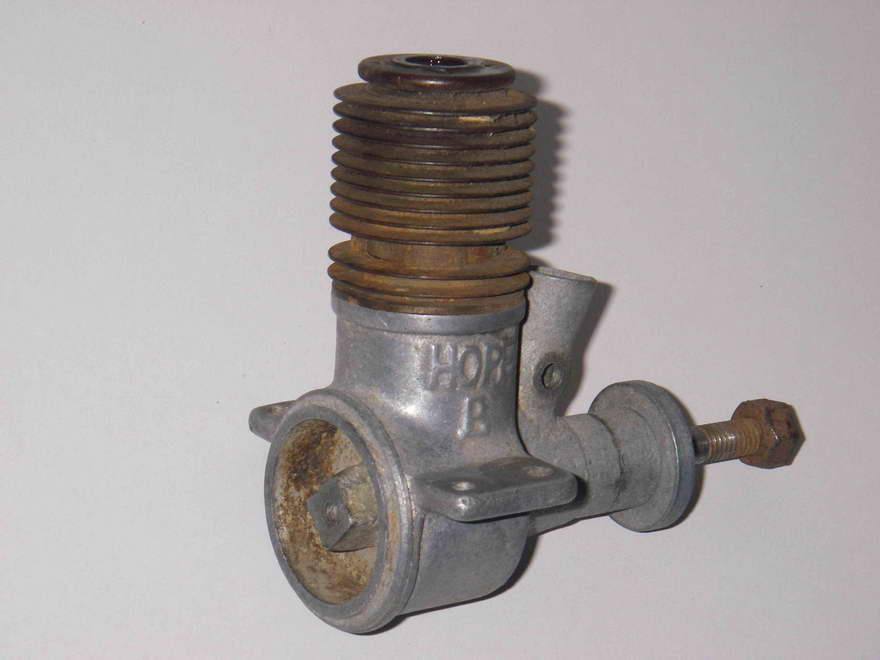
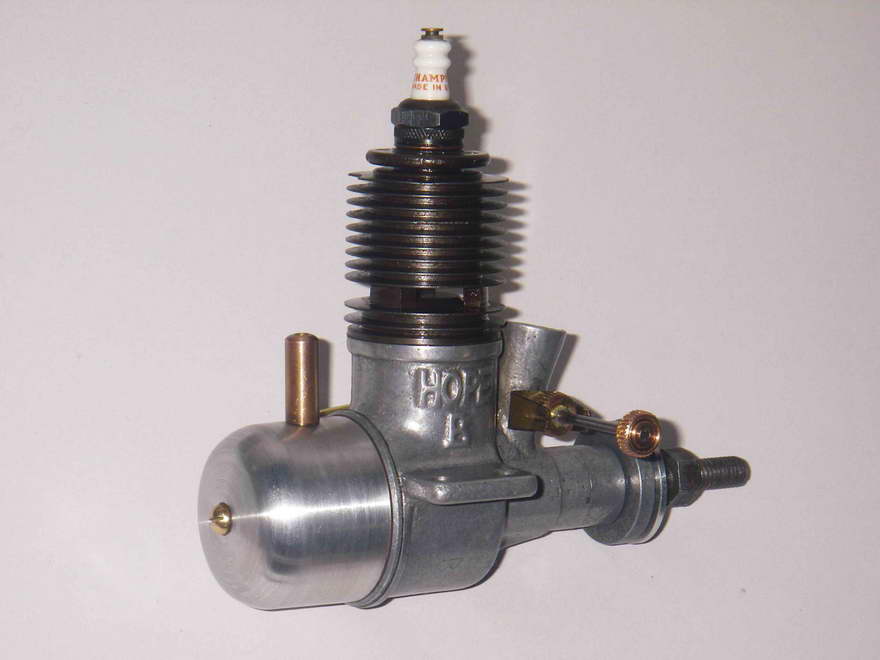
During March of 2009 I bid on an old Hope B .29 cuin glow-plug engine which appeared on eBay. The motor was obviously in pretty rough shape, but it had the attraction of being set up for a 3/8 in. plug, making it a relatively early example. It was missing a lot of bits, but those that were there appeared more or less intact apart from some obvious corrosion and the mandatory chip out of the top cylinder fin!
At the time, I was just getting started on the major Hope research project so I already knew these engines pretty well. Accordingly, I thought that I'd have as good a chance as anyone of restoring it or at least salvaging some useful components. I knew that I could make accurate repro components using examples already in my possession as a guide. So I went ahead and joined in the fun!
Despite the engine's corroded and incomplete state, the bidding was brisk and I ended up having to pay over US$100 to secure it. When it arrived, it became instantly and uncomfortably clear that my investment stood on somewhat shaky ground! If anything, its condition was worse than I had expected, and my first reaction was that I might have taken a few lumps! But I'd made the investment and was stuck with the results—best to see what could be done to salvage the situation...
The first thing to do was to assess the situation, taking plenty of time to do so. This is one of the most important steps in any restoration—far too many restorable engines have been further degraded through ill-considered attempts to fix them up before the challenge involved was fully appreciated and the appropriate steps were fully thought through.
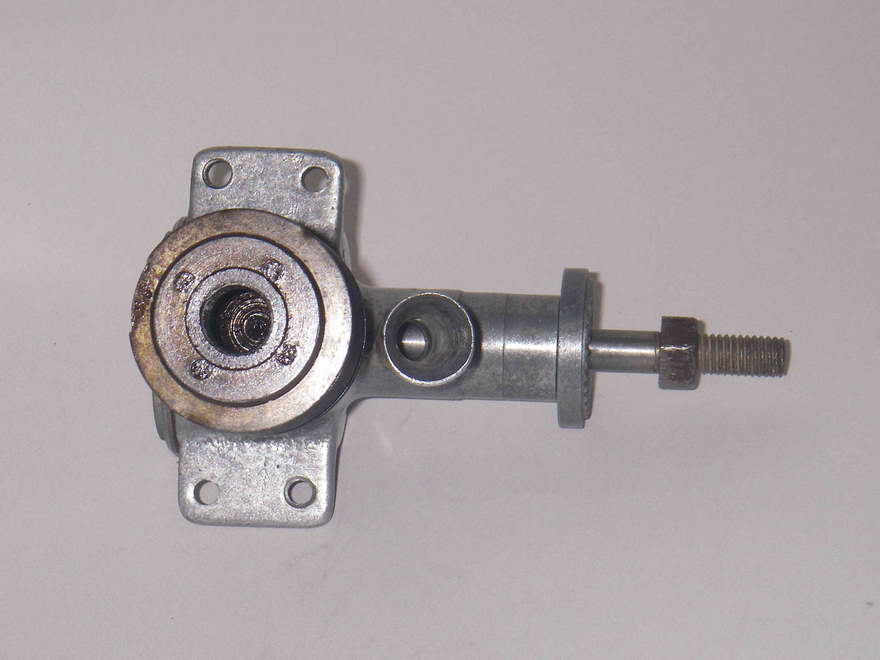
As received, the thing was basically a lump of rust, and my initial examination led me to the preliminary conclusion that the best I could realistically hope for was to save the case, shaft, prop driver and cylinder. I fully expected to have to make a new piston and rod as well as replace the entire fuel system (which was missing altogether).
I always start from the premise that the underlying approach must be to save as much of what's there as possible. This means avoiding any steps which will inevitably lead to the irreparable damage of any component unless every alternative has been tried. There are times when you have no choice other than to "sacrifice" a component, but that should always be a last resort.
A classic case in point relates to the preservation of the con-rod in engines like this one having a screw-in cylinder. On engines which are assembled in this manner, the first imperative is to get the piston unstuck in the bore so that the cylinder can be unscrewed without twisting the rod. On this rusted-up example, that looked like a bit of a challenge!
It was clear that if the piston proved to be "welded" into the bore by corrosion, the only way forward would be to sacrifice the rod by unscrewing the cylinder using a combination of heat, solvent and brute force, accepting the inevitable twisting and breakage of the rod. But before trying that, it was clear that every effort should be made to un-stick the piston. I honestly didn't expect to succeed, but the right thing to do was give it a go regardless.
The first step was to see how the parts were aligned in the engine's frozen-up state. This required the removal of the backplate, which was well and truly gummed in there. It was necessary to make the required special wrench and then heat the whole engine in the oven to soften the oil residues that were almost like glue. Even then, it was tough and required some nerve, but it finally came off after several attempts. You have to be patient and use the right tools.
Removal of the backplate revealed the con-rod and crankweb, which were far less corroded than I'd been expecting. The engine proved to have been frozen at about 20 degrees past top dead centre. This was good in one sense in that it was a reasonable expectation that any residual castor oil gum might have protected much of the bore and piston working surfaces under all that rust. Castor oil is a great rust inhibitor. I was mildly encouraged.
Next task was to see what lay underneath all of that surface rust! This required the removal of all externally visible traces of rust using a soft brass brush with Liquid Wrench (a very effective rusty nut unlocking fluid) followed by a long session in the ultrasonic cleaning bath. This treatment revealed the fact that all surfaces (including the exposed areas of the piston) were pretty good under the rust layer—evidently the aforementioned castor oil gum had done its work well. There was some etching, but nothing too drastic. So at this point I began to plan the further dismantling operations on the basis that the working parts might all be salvageable—before that, I had been prepared to lose both the piston and the rod in the course of dismantling.
I soaked the engine overnight in solvent, gave it a shaking in the ultrasonic cleaner, injected more Liquid Wrench and then tried very gently tapping the shaft both radially (using a crescent wrench on the prop driver square) and axially using a very light pin hammer and watching for movement. After another heating session and some more gentle persuasion while hot, the shaft finally displayed a little movement—as much as the rod would permit—and the Liquid Wrench capillaried into the bearing. The shaft was now clearly free to turn.
I put the engine through a further long sequence of heat cycles, applying more Liquid Wrench when hot each time both to the upper cylinder (through the plug hole) and through the exhaust and transfer ports and allowing complete cooling between heating sessions. Once I felt that the components had had enough opportunity to shift microscopically at their interfaces due to differential expansion (the heat source was external so the cylinder would heat faster and expand more rapidly), I inserted my 3/8—24 seized piston extraction bolt through the plug hole, cranked a bit of pressure on and heated the whole shebang once more under bolt pressure with some Liquid Wrench inside the cylinder. While still hot, I gave it a series of light taps on the still-tightened bolt head, and that did the trick—it shifted fractionally and the Liquid Wrench immediately capilliaried through the entire piston/cylinder interface.
After that, it was easy—I just lubricated the hell out of the whole engine with Liquid Wrench and then screwed the bolt down to push the piston down to BDC. Since I had already freed the rod and shaft, this did no damage—the shaft just turned as the piston came down. Then another heat cycle with the piston at BDC, and the use of a matching pin spanner (no Vice-Grips, please!) persuaded the cylinder to unscrew while hot with little trouble and no damage to the rod.
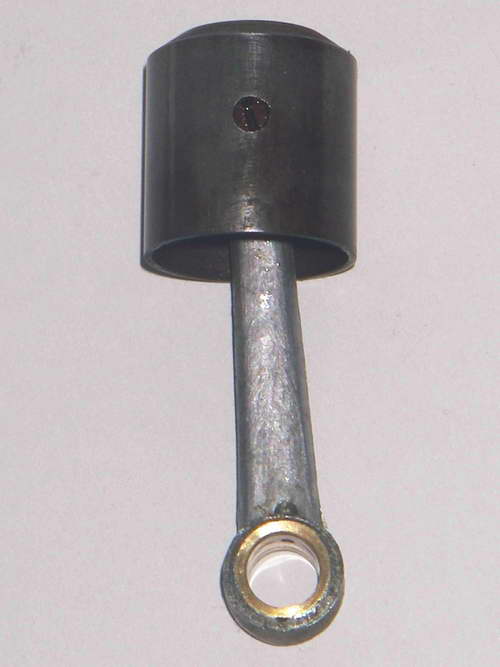
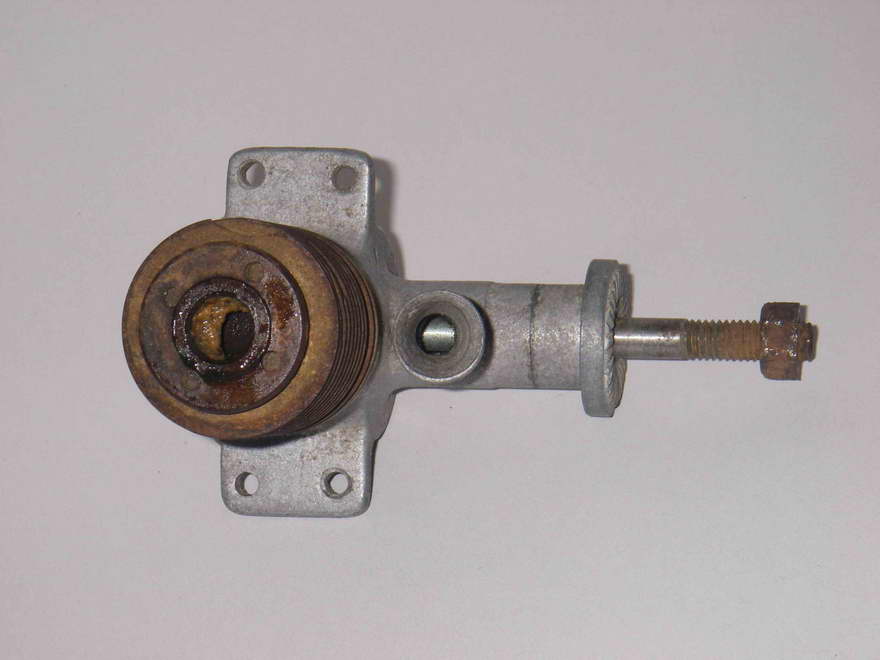
All the working surfaces proved to be in excellent condition apart from the very top of the bore and the areas of the piston which had been open to the exhaust ports. As mentioned previously, the thing had stuck very near TDC so the slightly etched areas of the piston were near the bottom of the skirt where such issues matter less in any case. The top of the bore above the point where the piston crown had stuck was a bit rusty and also had a bunch of sand in it—you can see some of that in the "un-restored" top view! But the rest of the bore was unaffected—I guess there must indeed have been a residue of castor oil, which is a great rust inhibitor. Likewise, most of the piston wall was rust-free.
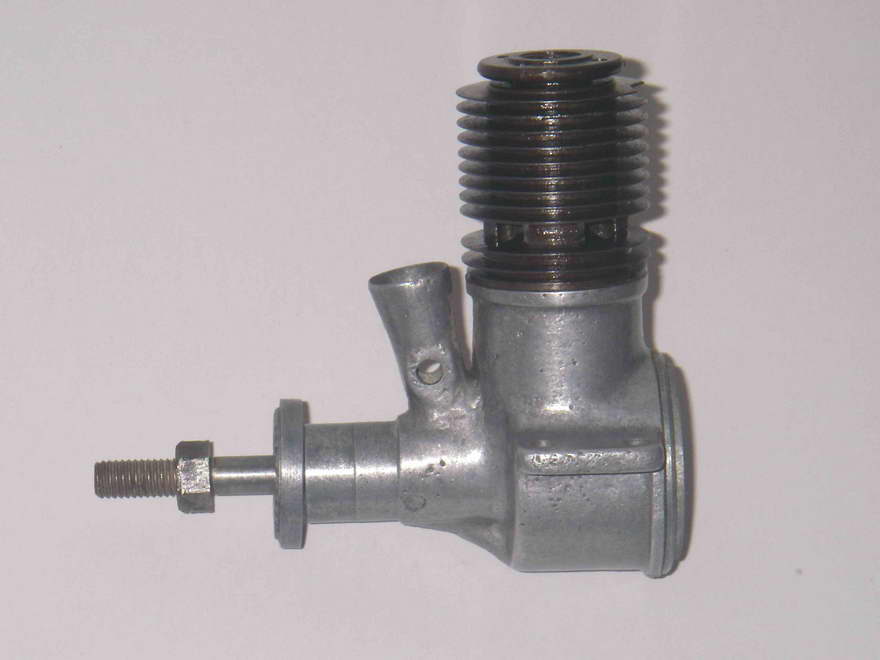
A bit of steel wool with Liquid Wrench soon had all of the residual rust out of the bore and off the piston walls, and I cleaned the parts ultrasonically and did a quick test re-assembly. Oh joy!! The thing turned over very nicely and the compression was outstanding! No need for a rebore!! The rod, gudgeon pin and shaft were in excellent condition—indeed, the engine appeared to have been little used. The castings were close to mint. I ran it in for 5 minutes on the lathe without a plug, after which it felt superb.
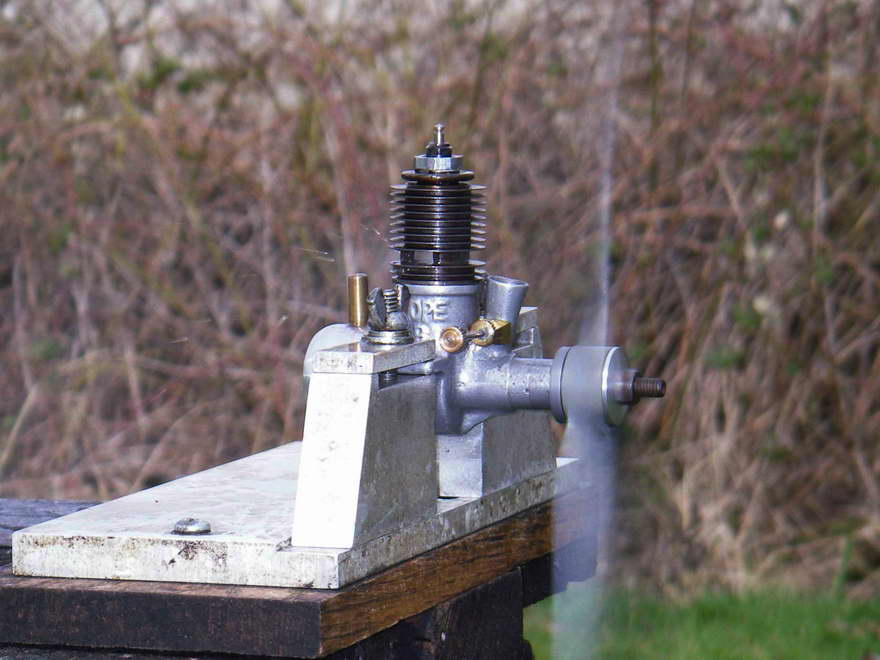
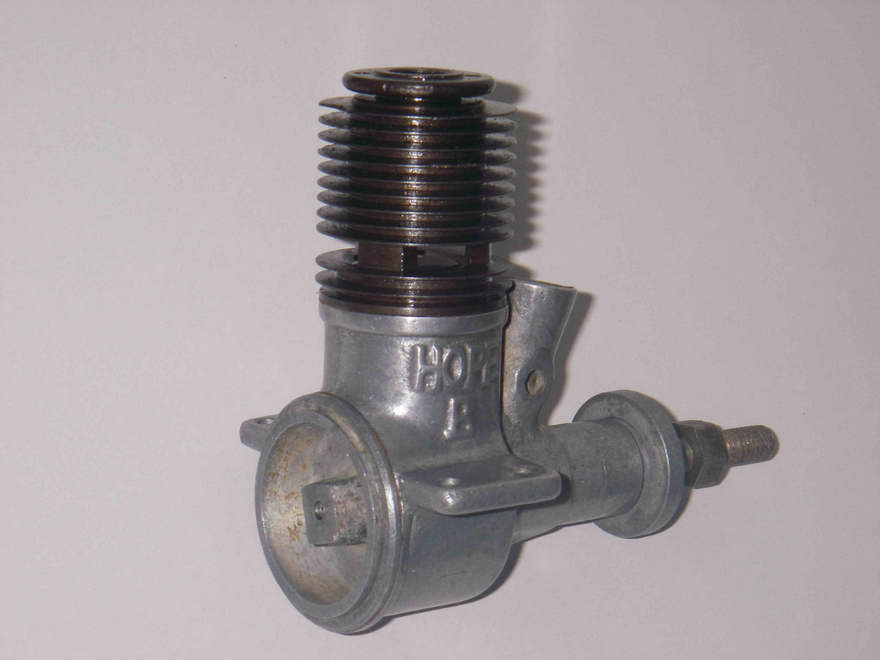
I then dismantled it again for a final cleaning prior to re-assembly. Once that was done, it was a simple matter of making a replica fuel system and prop washer, and there it was! A subsequent test session proved that it ran as well as it looked!
The moral of this story is—never give up until all avenues have been exhausted. Slowly and persistently does it, using the right tools and methods—we lose too many old engines to over-hasty attempts to sort them out. Take your time, and it's amazing what can be saved!

This page designed to look best when using anything but IE!
Please submit all questions and comments to
[email protected]
|
Unless otherwise expressed, all original text, drawings, and photographs created by
Ronald A Chernich appearing on the Model Engine News web site are licensed under a Creative Commons Attribution-Noncommercial-Share Alike 3.0 License. |

|