Editorial
Welcome to an unavoidably late and lamentably truncated July 2010 Model Engine News edition. Despite my best hopes that things would be otherwise, I'm still in hospital and likely to stay here for most, if not all of the month. But I'm active, in no pain, and wanted to get what I can of the planned July issue on-line without further delay. Due to circumstances beyond my control, as they say—like no workshop, no scanner, no Library, and very limited bandwidth—a couple of regular features will be rather light on, but I hope the other special features make up for this.
As to why I'm here, for the past six months or so, I've been feeling a light, annoying pain in the upper right leg. To cut short a long story which I'm sick of relating, on June 26, in the space of the sixty minutes it took to drive back to Brisbane from a digital library conference on Australia's "fabulous", glitzy, Gold Coast, this pain went from background to agony. So the next day, with no change, my partner Ruthie and I decided that the Emergency ward at the Wesley Hospital was the place to be, and very shortly after, a diagnosis of prostate cancer at a PSA count of almost 700 was delivered (normal, I now know, is 4). In quick succession, blood, platelets, and kidney mysteriously crashed and I was told not expect to be going home any day soon. Some days later, just as mysteriously, they "come good" (ok, six bags of blood obviously helped the hemoglobin) and I feel exactly as well in myself as I did before, better even as the leg pain is gone, though I've lost 10kg and tire more quickly. However the prostate cancer has spread through my bones, so here I remain while the medical profession does its best to see to it that I'll be as active as possible for as long as possible, after they let me out.
The result of the above (and I don't blame you at all if you skipped the last part of it) is that I've had to do some emergency work of my own to get this to you. After large doses of morphine to get the pain under control, I prevailed on Ruthie to bring in my laptops (an old Acer with XP Pro, and a nice new Macbook with OSX Snow Leopard), then to run out and buy me a USB radio dongle for Internet connectivity (hospitals here do not yet provide wifi to patients, which I find a little amazing, given how bored they must get). Configuring that was not straight forward and as I suspected, the XP machine flips up the Blue Screen of Death every time I plug the dongle in. Naturally, it works fine on the Mac, so I was left with the problem of having web site stuff on the PC with no Internet, and Internet on the Mac, with no working copy of the website source repository and none of the tools I use to put it together, besides the basic utilities.
This is not awful as the Mac is essentially a Linux box and that is my preferred environment as well as one I understand quite intimately. After a few cunning tricks, I made a working copy on the Mac of the MEN site Subversion checkout from PC using a USB memory stick. There were initial problems relating to file permissions (chflags to the rescue), but I was finally able to point the copy at the main repository which sits on a Linux box at home that is available on-line 24x7. I can connect to home using secure shell (SSH) and use my low laptop outbound bandwidth to drive the home system for the "heavy lifting" to the actual website. This required rewriting the end of month XP "batch" file which assists preparation of the zipfile that is used to update the web site. I've been wanting to migrate this little task to Linux/Unix for some time as the control available under Linux/Unix scripting is vastly superior to the MS Windows equivalent and I've now been able to automate steps which were previously being done using a check list and manual command entry, so overall, I think I'm ahead.
What I don't have on either laptop is a copy of the DVD image, which includes the highly valued cookie, necessary to generate the Members' update zip and burn DVD's. I'm hoping for a "day pass" soon which will allow me some frenzied time copying more stuff to the Mac (probably not what my doctors think I should be doing) after which I will be able to produce the Members' Update Zips again.
As to the future, in general, Australians tend to be a rather modest, reserved, self-contained lot, and I may be an extreme case in this regard—for an Ares. The above is as much self-disclosure as I'm comfortable with—probably a bit more, actually. Ruthie and I want to sincerely thank the dozens and dozens of readers from countries all over the world who took the time to send quick "get well and forget the web site" emails. They cheered us both up no end and made me feel wanted during a rather depressing period. For now, we'll just take it as it comes and see what happens.
The Replacement for Piano Wire

To state the blindingly obvious, the best alternate to piano wire is piano wire! Double speak? Not when you replace the hobby-store product with the musical instrument variety. This revelation came days after the June Request For Information was posted, courtesy first of Steve Rothwell, the Ozzie maker of the much sought after Rothwell engines—the ones that look a bit like Ollie Tigers and perform every bit as well, maybe even a bit better. Steve pointed out that while it comes in 250 or 500 gm coils instead of short straight lengths, piano wire is a very, very high grade of steel wire, available in many different sizes from 0.20mm to 1.70mm, and much, much cheaper than the stuff you might buy from the K&S rack at the hobby store. Add to this, music wire (generally German made) is extremely regular in cross section, with a very smooth, hard skin, making it ideal for spring making. The fact that it is coiled may rule it out for some applications, but for springs, it's just perfect. Steve kindly sent me some samples in sizes around 1mm and my spring problem of the moment is cured.
It's all 'kinda embarrassing that I did not think of this myself. Especially given that I claim to be a lapsed musician who has in the past bought the occasional 0.009 (0.23mm) banjo string from which to make a very light spring for some free-flight gizmo, hence you'd have thought I could have made the connection. Obviously not, so it's great to have smart readers only an email away. Then there's the baby grand in my living room that gets played very occasionally, but tuned every year. When the piano tuner comes around next month for the annual tune-up, I must ask him what he does with old strings. We modellers are a miserly lot...
MECOA and Other Updates
I've tried to keep MEN non-commercial and unbiased. I think I've been successful, limiting myself to book reviews, and the occasional product review. In the grey corner sit the Suppliers Page, which is has links to vendors I have some reason to trust with items intended to assist model engine builders with their special needs, and the Links Page which contains (ahem) links to commercial sites that I have not heard any (or many) bad things about, cool non-commercial sites, and some select forums dedicated to model engines and model engineering. The commercial links have listed Randy Linsalato's MECOA since day one. It's not uncommon for me to receive emails asking for a "link exchange" (you scratch my back, I'll scratch yours). If the request is genuine and the site fits with what I arbitrarily define as being of interest to MEN readers, in it goes. I never seem to get around to checking if I got my reciprocal link or not.
Where is this going, you ask? Randy, you may know, has been accumulating rights and tooling to defunct brands for years. Mostly, nothing happens—he has to make a buck after all and tooling up for a run of Johnson 36's would leave him, I suspect with more inventory than profit. But not so with K&B, now part of the MECOA stable and the topic of his email asking for an extra link, direct to K&B. No problems, sez I, and while doing my "due diligence" on the various MECOA sites and products, I noticed that replacement Cox TD and Medallion venturi assemblies, "from original molds" are being listed as "coming soon". I hope this translates to actual product as I know of a small but desperate number of people needing just that part to restore an engine or two, myself included.
So the Links Page entry for RJL Industries has been updated, a new one for K&B Manufacturing added, and the MECOA Forum added to Forums section. My part is done.
oOo
During June, an unexpected email arrived from Ilya Leydman (Australia) who had read Adrian Duncan's Marz Review and was in a rather unique position to expand the story of how this very Eastern engine made its way West. Adrian and Ilya have got together to inject a lot of very enlightening new material into the review. Adrian was pleased, or perhaps relieved that he had nothing factually wrong—all the new material is a part of the story we did not have. For instance, if you were a major Moscow aerospace company who specialized in servicing giant Soviet helicopters, as well as making the occasional model airplane engine, what would you do with roller bearings removed from rotor hubs as part of scheduled maintenance? You'll have to re-read the whole thing to find out, and no fair searching on "helicopter"!
Air Age

Knew I'd seen a cover like that used on Ulf Carlén's Swedish Model Engine Encyclopedia, reviewed last month somewhere before. My instinct said it was in a 40's vintage Model Airplane News (MAN) issue, so I kept my eye open while scanning for Speed Demon mentions for this month's engine review. Sure enough, a 1947 issue has an advertisement with a tiny picture of a similar cover design. The publisher was Air Age Publications who also published the Wylam scale drawings which appeared in MAN, as well as MAN itself in those days. The booklet came out in 1943 and contained drawings for old "gassie" models. I was going to find a better MAN ad for it when a reader kindly sent in an excellent full color scan of the actual book cover. Seen side by side, the heritage is obvious although the engine silhouette is different, as is the orientation and other details. This in no way detracts from Ulf's book, in my opinion. It's a good design, with a great art deco feel to it that is somehow "heroic" and for me, captures well the optimism and boundless enthusiasm of early aeromodelling.
Ted Martin
As promised last month, we now have a fitting tribute page available for EC "Ted" Martin (1922-2010), put together through the tireless efforts of Adrian Duncan and Jim Woodside. I'm sure you'll find this of interest, first because it provides some insight into what was happening during the golden post-WWII period of model engine design and manufacturing, highlighting Ted's involvement with it in England and the USA (even though like Dave Sugden, Ted had emigrated to greener pastures in Canada). We could have stopped there, but Adrian argued strongly in favor of including Ted's "outside" activities as they show a man with ability and determination a bit out of the ordinary who achieved things during his life which he admitted "would not be possible today". After reading the extraneous material, I agreed completely, so please read and get some enlightenment out of Ted Martin and AMCO Engines.
MAN 19
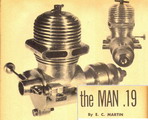
I have to admit that I've wanted to make this engine for so long, but for all that, never actually got around to doing anything about it. First it was because of all the work in hogging out that case and not being sure my skills would be up to it. When that was patently no longer an issue, I got side-tracked on four-strokes, and multi cylinder jobs, so for one reason or another the MAN 19 project never really got off the launch pad. Now? Who knows. But certainly for all you builders out there with a diesel or two under your belt already, how about building a high performance (for the mid 1950's) twin ball-race, rear rotary valve, 3.5cc diesel using the new MAN 19 Page.
The rather yellowed old instructions have been turned into readable text pages and edited a bit, but the drawings are as Ted Martin drew them. Magazines need brevity from their authors to make space for advertising, so I've expanded abbreviations and reinserted the occasional understood "the" when understanding seemed improved by it, but the actual sequences and methods are as Ted wrote them. I can't say I agree with some of the methods he used, in fact a couple of them positively horrify me! But as we've noted before, it's what you've found works for you that counts. If you don't feel easy about one of his techniques, try substituting one of mine. And if you are not fussed on them either, fiddle about until you find what works for you.
Ted said it took him about 36 hours to make the prototype. That sounds about right to me for a good, working engine. A show-quality one will take a bit longer. Even if you don't build it, be sure to read the Break-in page where Ted hands down some solid home truths on why it is foolish to forecast how long the process will take.
Finder V3.0

I've found readers of MEN to be a very understanding, smart, and thoughtful lot—as they have to be to "get" what I jokingly call a sense of humor. Not infrequently, I'll receive an email saying nice things about the site (warm glow), amazement about how I manage to find the time to build the web pages, models, compete in contests with the occasional win, and hold down a research job as well (glow increases to a buzz), and finally suggest some addition or project which would help "everyone" (buzz snaps off, shutters come down, Ron reconsiders just how much time he could be spending sleeping...)
Well, not really. Most of the suggestions are good ones, as was the one in an email last month from a US reader saying how he had just used the old Engine Finder to track down an engine, but how much easier it would have been if, for instance, he could ask for all .19 cuin displacement, RRV, glow-plug engines. As a software developer himself, he knew what he was asking and added that his suggestion was one that could wait for the proverbial rainy day.
I could not help but agree that this was a really great idea. The list from which the Finder is regenerated each month is a simple XML structure. If that was modified to include extra codes for each entry, such as ignition type, induction type, country of origin, etc, then we get the full list, or one "filtered" by various user selectable criteria, almost for free. We could then say things like "show me all the British glow engines under 1cc". As it turns out, the coding part would not be hard at all, but adding all the extra metadata for 414 engines would not be a quick job.
Until now, the only metadata held for each Finder entry has been a flag which marks the entry as new or updated in the past month. As you might guess, this flag is used to populate the second list below the main one when the new page is generated from the XML data. Were we to remove that secondary list, add a New or Updated checkbox, then our new filter button could do that job for us using just a single list. The coding is simple as pie, all I need is a knowledgeable sucker, err volunteer, to do the dog work. Adrian? Here boy...
As yet, we don't have the extra fine-grained data needed for type etc, but even so we can start to get some of the benefits just by doing a word match in the description. So type "diesel" into the filter text field, press the button, and see only those entries where the word "diesel" appears in the description. This will not be 100% accurate because not all diesels have "diesel" in the description, but it sure would show you all "fox" entries, which may help until the full job is done.
The Finder has worked for people before because it was just a simple alphabetical list. There's always the danger that by adding features, the thing gets harder to use and the effort is self-defeating. Please try out Finder 3.0 and let me know if you don't like it. We can always go back...
New Books and Magazines This Month
There were no new books into The Library during June, so normally I'd look at the bookshelf and see what I had bought and found to be of value, back when I knew nothing about machining and engine making, which could be reviewed and passed on as a recommendation. Obviously, I can't do that either. But I do have three issues of the Model Engineer with me that Ruthie picked up for me from the news-agent which holds them for me. These have now been read in more detail than I would have otherwise, including all the steam stuff! The issues are volume 204, numbers 4373 through 4375 (news-agent copies arrive by slow boat, so they run about three months behind down here).
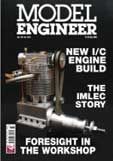
Skipping the steaming content—which I rather enjoyed, showing how sick I've become—all have IC articles, including the start of a hit 'n miss engine from bar-stock. The ME and companion magazine Model Engineers' Workshop got a new editor some time back, namely Mr Dave Clark. At the time, he told ME readers he would do his best to increase coverage of internal combustion and has been true to his word. I know that the ME will need no introduction to most readers, but if it is new to you, have a look at their website to get an idea of the content. The site boasts Yet Another of those blessed forums, as well as a "trial" read of digitized issues. The one I saw had part of the series by the late Malcolm Stride on building his barstock 4-stoke Lynx. As the plans are currently unavailable, a "digital only" subscription may be your only way of obtaining the "words and music" for this popular 15cc sparker.
Better yet, if your funds run to it, buy a volume or two from the 1940's or 50's. They are not expensive, although the freight will be. I can't begin to number the amount of tricks, techniques, and knowledge I've picked up from reading those old issues.
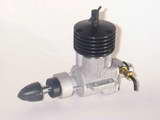
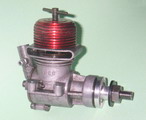
Engine Of The Month: Speed Demon
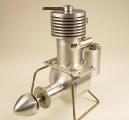
For more than a little while, Adrian Duncan has wanted to expand on the Speed Demon page notes provided many moons ago by Bert Streigler (which you can still read here). Other things kept getting in the way, and besides, we have one page already, why add another? Well, the answer to that part of the question lies in the new page which we believe to be quite authoritative. In preparation, I scanned MAN issues from 1947 into the early 50's looking for any mention of it in advertising. Result: utter failure; neither could I find it in my meager collection of Air Trails for the period. It was obviously known, but advertising must have been very local. The other reason I gave the go-ahead on this one was a feeling that British diesels have been getting too much attention lately, and even if I could not depart from the diesel, I could at least give a US maker the spotlight. Click the thumbnail, or follow this link to the Speed (!?) Demon.
Tech Tip of the Month
I had a small but good restoration tip planned for this month, complete with dramatic "before and after" photos. Unfortunately, the "before" shot is on a memory card someplace at home, and the "after" shot has not been taken yet. So rather than describe the tip with arm-waving, I'm just going to sit on it for a while until I can get the photos together as the results are rather striking.
But I'd like include something, so I'll just mention how truly easy it is to make prop drivers that fit to a tapered shaft, or tapered split collet, using a shop-made D-bit reamer. I suspect beginners shy off this thinking that as beginners, they are not up to making tools yet. Not so! Tool making is generally one of the first exercises given to apprentices and I've met some retired machinists who still use tools made during their first-year. I wrote about the "Humble D-Bit" at length for Model Engine Builder some time back. If you email the editor, you can most likely get the back issue in question. The tip that follows was part of that article.

Matched, locking tapers is a good way to fit a prop driver to a crankshaft. Well made, they lock very tight, provide strong support for the prop at perfect right angles to the shaft axis, allow shaft end-float to be easily fine-tuned, will slip without damage in extreme cases, yet can be broken apart as often as you like with little effort. The male part can be integral with the shaft, or it can be a separate, split collet—the method sensibly favored by countless commercial products for its simplicity and effectiveness. Strangely, many builders seem to avoid them because of some a concern over getting the tapers to match. If both male and female tapers are turned at the same setting of the compound slide, they must match, but the geometry of the setups are such that generally the set-over needs to be in different directions for the shaft and driver, and as we need better accuracy than the graduations provided on the topslide angle indicator, the answer to everything is a tapered D-bit reamer.
Obviously the tapered D-bit reamer is used to ream out the female taper in a prop driver. Perhaps less obviously, when mounted stationary in the headstock chuck, the reamer can be used in conjunction with a Dial Test Indicator (DTI) to clock the compound slide to the exact same taper as the reamer itself, or near enough, thus allowing a mating male taper to be turned. As most will already know, a D-bit is formed by removing just under one half of a round piece of drill rod so that it looks sort of like the letter "D" in cross section. The reason for not removing exactly half is to leave an allowance of say 0.003" to not more than 0.005" for later stoning of the face to produce the cutting edge, and the occasional touch-up. If it goes under one half diameter, it is not going to cut well, if at all.
That half-diameter plus stoning allowance is easy to measure if the rod is straight, but what do you do when it has a taper? Simple. Before turning the taper, turn down about 1/32" (or about 1mm) to a bit less that the minor diameter at the end of the taper. Measure this carefully and use it as the measuring point while grinding or milling down towards the half diameter plus 0.003 allowance. When the straight tip is right, so must be the rest of the reamer. Then harden, polish, temper, and stone the face. The Weaver Construction Log and several other pages contain more detail of this process. Note that the taper itself does not need to be precise as we use the reamer itself as a "master" for the male taper.
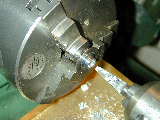
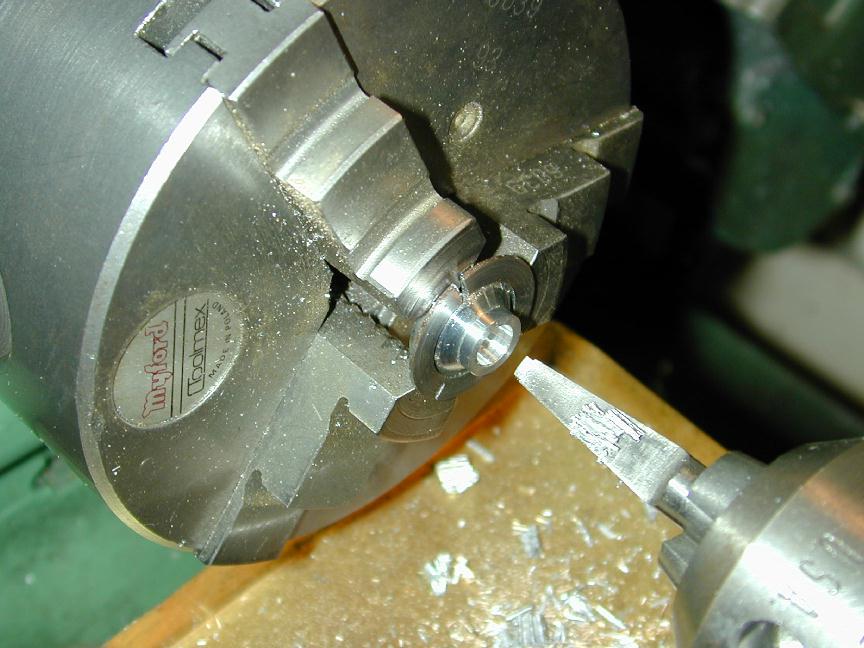
It really is simple and cuts perfectly if used at slow speed. I generally use back-gear to start, and finish pulling the chuck through by hand, watching fine, regular shavings of metal come away. If your lathe has no back-gear, do the whole thing by hand, but be sure to mount the D-bit in the tailstock with the driver either still part of the parent bar stock, or gripped in a pot-chuck. And what's a "pot-chuck" you ask? That is another simple shop-made fixture that will last you a lifetime and repay the time it takes to make over and over. This photo from the Eze 3 Construction Log clearly shows the measuring step at the tip of a D-bit taper reamer, which is in action cutting the female taper in a prop driver held in a pot chuck. It really is simple, after you've done it for the first time.

 Editorial